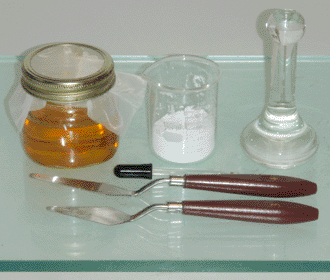
Transparent varnishes and enamels are useful for interior applications, but are susceptible to degradation from extended exposure to ultraviolet light. Therefore, for structures and objects that remain outdoors, paint is the most common type of coating. A paint is nothing more than an opaque pigment suspended in a drying binder, and conveniently I had both of these materials available. I wanted to make a white paint, so for the pigment I used the leftover titanium dioxide from an earlier solar cell experiment, which I mixed with 10% zinc oxide (from my conductive glass project) for mildew protection. For the binder I used raw linseed oil, which I lightened in color by exposing it to both sunlight and air for a number of months. While the pigment and oil could be mixed directly together until the desired consistency is achieved, this would produce a paint with a large excess of oil, drying slowly and likely containing small clumps of pigment. To produce a higher quality paint, I decided to use traditional paintmaking hand tools; namely, palette knives and a muller.
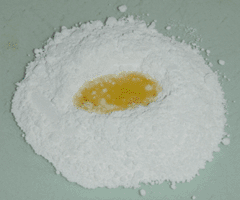
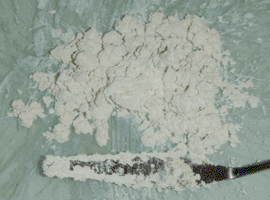
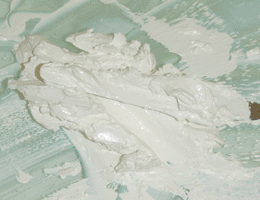
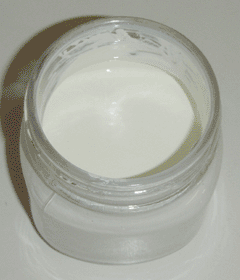
I began by pouring the some of the pigment onto a piece of plate glass, using a palette knife to make a small crater in the center of the pile. I then added a small amount of linseed oil to this crater with a dropper, and folded the pigment into the oil with the knife until it fully absorbed. I repeated this process until the mixture had become a hard, crumbly paste. I then mulled the paste in small portions; this rolls the pigment particles in a thin layer, breaking down any pigment clumps, releasing any trapped air, and ensuring that the titanium and zinc oxides are evenly mixed. Interestingly, the mulling process had a thinning effect on the paint, turning it into a stiff paste that no longer crumbled. I continued mulling, adding small amounts of oil, until the entire batch of paint had the consistency of warm butter. These steps can all be seen above.
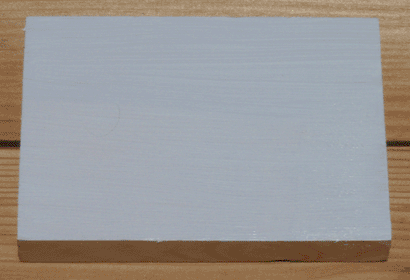
At this point the paint was usable for artistic purposes, and could be spread thickly with a small brush. However, for general purpose use, it required further thinning. To achieve this, I added the full batch of paint to a small mason jar, and stirred in turpentine until it was fully liquid and brushable. I weighed the paint between each step of this process, and in the end I had used 75g of pigment, 50g of oil, and 50g of turpentine, for a 3:2:2 ratio by weight. I then painted a small test board and left it outside, where it dried in less than a day, having a semi-gloss finish and good coverage of the underlying wood. Overall I am pleased with the results of this paint, and have found it to be the most straightforward of all the coatings I have investigated thus far.
While the above process produces a paint with a maximum pigment concentration, in most cases this is unnecessary since excess oil is usually harmless and often beneficial. A simpler method to produce oil paint consists of using a drill mixer to blend dry pigment into linseed oil (raw or boiled) until it thickens to a brushable consistency. The high viscosity of the oil combined with the high speed of the mixer likely produces a self-mulling action, in which the oil shears apart any clumps of pigment floating within it. In any case, I find paint mixed this way to be completely acceptable for most work, with the possible exception of airbrush painting where a stray pigment clump (if it exists) might clog the nozzle. For a more scientific approach, the original method could also be used to determine the ideal ratio of pigment, oil, and turpentine, and then larger batches could be blended quickly with a mixer in the same proportions. In general, manual mulling is primarily useful for making very small batches of paint, or for making paint which is intended to be stored in tubes.
EDIT: 1/19/2025Although turpentine is an ideal thinner for oil paint, it becomes prohibitively expensive when painting large surfaces such as houses or fences. Furthermore, its fumes are often undesirable when painting in poorly-ventilated areas. As an alternative, I have found that viscous starch solutions (e.g. wheatpaste) readily emulsify this type of paint and can therefore be used as an alternative thinner, particularly when borax has been added to the starch. This type of emulsion paint will be investigated in detail in a future article, as it allows for the practical manufacture of large batches of paint at low cost, and nearly eliminates the usual odors associated with drying oil paint.