|
|
|---|
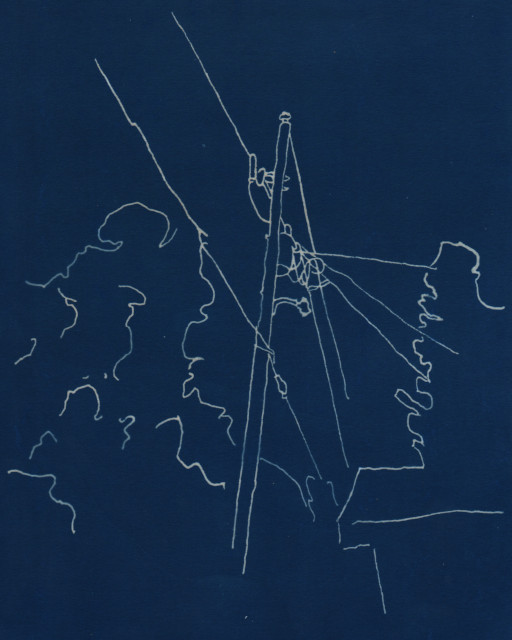
Although my cyanotype method is useful for making contact prints from negatives or physical objects, chemically it is far too slow to be useful in a camera. For this reason, I decided to build a camera obscura for the purpose of capturing three-dimensional objects in a two-dimensional medium. This device uses a movable lens to focus a scene onto a translucent sheet of paper, where it can then be traced with a pencil to record an image. This image can then be darkened with ink, made transparent by applying paste wax, and used as a negative to produce cyanotype prints. While this indirect method of photography is somewhat time-consuming, it requires no expensive materials or darkroom equipment, and is generally a fun and interesting way to take a picture.
I began by choosing the size of the paper to be used for tracing, since its measurements would determine all other aspects of the camera. For the sake of convenience I decided to use standard printer paper (8-1/2 by 11 inches), since this would provide a large surface to draw on, and translucent vellum paper was readily available in this format. Consequently, I then chose to use a lens with a 300mm focal length, since making the focal length of the lens similar to the diagonal length of the paper results in a fairly normal field of view. In order to capture as much light as possible, I then purchased the largest lens I could find with this focal length, having a diameter of 100mm. While lenses with a large diameter (relative to their focal length) always come at the expense of a reduced depth of field, I found this to be an acceptable trade-off, since brightness is more important than sharpness in this application.
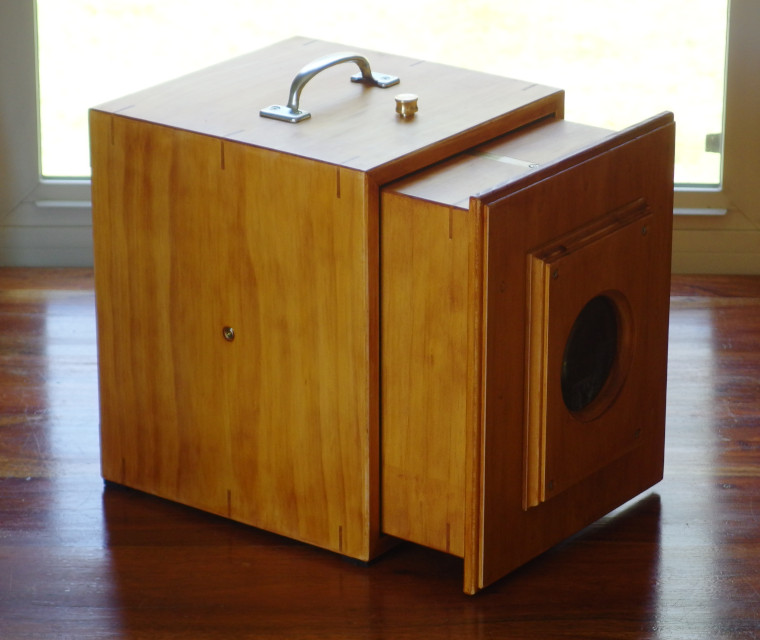
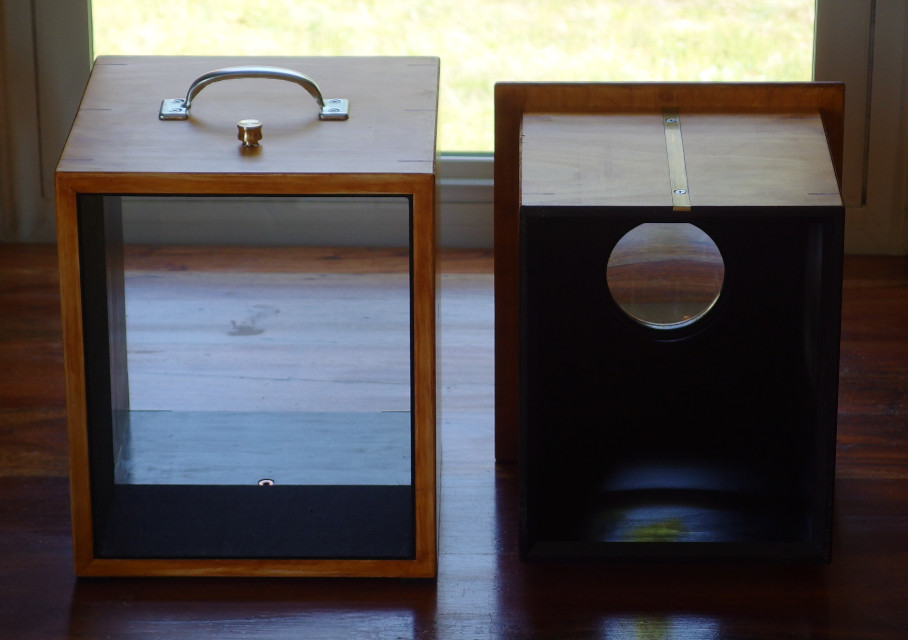
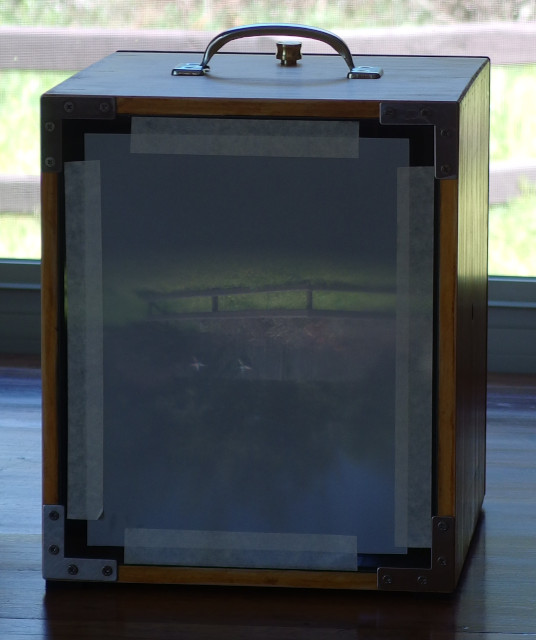
With these critical dimensions established, I then built the camera itself. Fundamentally it consists of a telescoping pair of boxes, with the lens mounted on one end and a pane of glass mounted on the other, to act as a support surface for the paper. When fully retracted, the distance between the two is roughly equivalent to the focal length of the lens, enabling the camera to focus on distant objects. For closer objects, the inner box (holding the lens) is extended outwards until the image becomes sharp. The exact spacing can be calculated via the lens equation, but in this case, roughly four inches of travel seems adequate to focus the camera at all typical distances for photography.
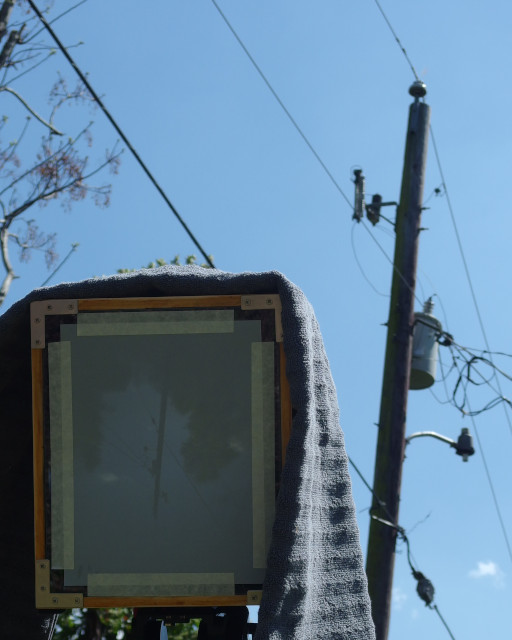
Mechanically, the camera is built from radiata pine, which was relatively cheap considering the width of the boards needed. Both boxes were constructed using splined miter joints, and the front panel attached using bamboo dowels, with all joints being assembled using flour-modified borax-casein glue. I then diluted the same glue with water to approximately 5% solids content by weight, and used it to seal the wood before applying garnet shellac. I then applied a layer of fast-drying black paint to the interior, and a layer of paste wax to the exterior and sliding surfaces. Threaded inserts were then used for the focus-locking knob on top, as well as for tripod mounting points on the bottom and sides. Finally, I applied a layer of dense self-adhesive felt as a bearing surface for the sliding focus, and in one-inch squares as padded feet on the underside of the outer shell. The final assembly can be seen at the top of the page, while a demonstration of the camera in use can be seen below.
|
|---|
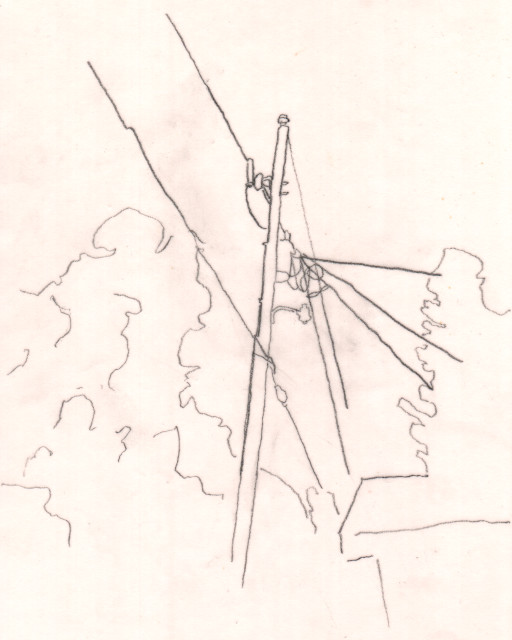
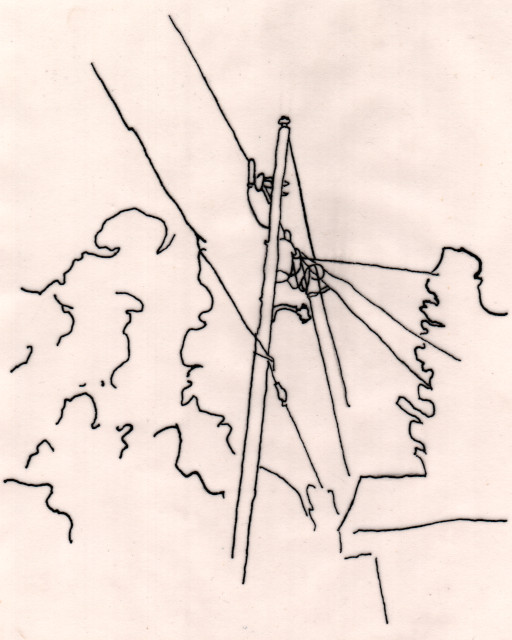
Overall I am happy with the results I was able to achieve with this camera. The projected image is bright enough to be easily traced, particularly if a dark cloth is used overhead as a shade. The weight of the camera did initially pose a problem, but after switching to a heavy-duty tripod (designed for video equipment), the pressure from drawing on the glass no longer shifts the projected image, and the tracing process has become relatively comfortable. Ultimately, my only issue throughout this project came from the use of shellac as a finish. Due to the nature of shellac as well as my own lack of practice, I encountered numerous problems with drips and overlaps, which I was thankfully able to correct by sanding the edges of the camera to produce a weathered look. This was not ideal however, and I plan to develop a more well-behaved shellac-based finish immediately, as its fast drying time and sparkling gloss are appealing for projects which do not necessarily need the water-resistance of an oil varnish. That aside however, I am also looking forward to exploring the various uses of this camera for artwork, as well as in projects to come.