
Tin oxide appears to be the perfect material for making conductive glass on a home lab scale. After writing the previous article, further experimentation revealed that very little is critical about the deposition process other than the substrate temperature, which ideally is between 350 and 400°C. Conductivity appeared to be directly proportional to the amount of stannous chloride applied to the substrate, regardless of spray timing or solution concentration. The fact that deposition can be done in short bursts means that using ordinary window glass as a substrate is possible, despite its sensitivity to thermal shock. Furthermore, I discovered that deposition onto a microscope slide is fairly wasteful due to overspray, and 30mL of 0.5M SnCl2 solution is sufficient to coat a 3x3 inch square of glass. All of these these facts made the material seem very promising, with the exception of the fact that the sheet resistance tended to reach a floor of about 100 ohms per square, beyond which both opacity and solution usage would increase to impractical levels. To overcome this hurdle, I used fluorine.
In tin oxide, fluorine acts as a dopant by taking the place of an oxygen atom and providing a free electron. Typically it is added to the precursor solution in the form of ammonium fluoride (NH4F) or hydrofluoric acid (HF). I used what is essentially a combination of the two, in the form of ammonium bifluoride (NH4HF2), which I found 50 grams of for $9 on Ebay. The solution used for the slide at the top right is essentially the same as that used for the previous slide, which can be seen in the top left. I mixed 3.4g of stannous chloride with 30mL of water, then acidified it with hydrochloric acid. This time however, I also added 107mg of ammonium bifluoride, which corresponds to a 4:1 molar ratio of tin to fluorine. Such high doping levels are necessary because only a small portion of the fluorine in solution is retained in the oxide film. The majority is lost to the atmosphere in the form of hydrogen fluoride gas.
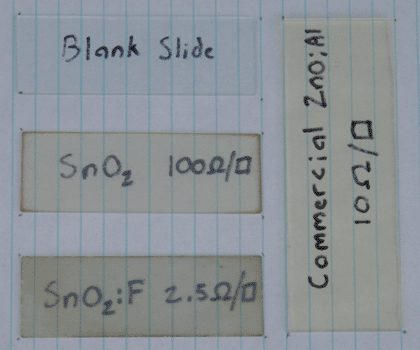
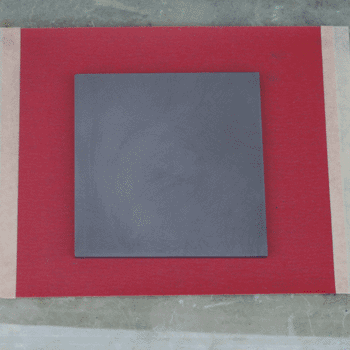
With the solution prepared, I then deposited it in the exact same manner as in the previous article. The resulting slide was somewhat more opaque, but had an extremely low sheet resistance of 2.5 ohms per square. This is comparable to the lowest figures I have seen in research papers, and is lower than any commercial glass I have seen. Previous tests with un-doped tin oxide were very consistent, so I am certain that the difference here is due to the fluorine doping. Below is a picture of the slide in direct comparison to the previous article's slide, commercial ZnO:Al glass, and a blank slide for reference. I have also included a picture of the graphite hot plate and its sandpaper flattening setup, which I failed to include in the previous article.
At this point, I have reached my goal of making useful conductive glass. That said, a few things can still be improved before I move on to the next stage of this project. First, the transparency can be improved by reducing the thickness of the film. I don't necessarily need the conductivity to be as high as it currently is, so I will attempt to make a film with one quarter the thickness and a sheet resistance of 10 ohms per square. This will also reduce the amount of stannous chloride solution required, making the glass faster and more economical to produce. Second, I will optimize the fluorine concentration, which could potentially improve the conductivity and transparency of the glass.
Overall, I believe I have thoroughly proven that conductive glass can be made cheaply and easily, using readily available equipment in the form of a camp stove and an airbrush. I hope this will be useful to anyone wanting to experiment with transparent conductors, for whatever purpose they may find them necessary.